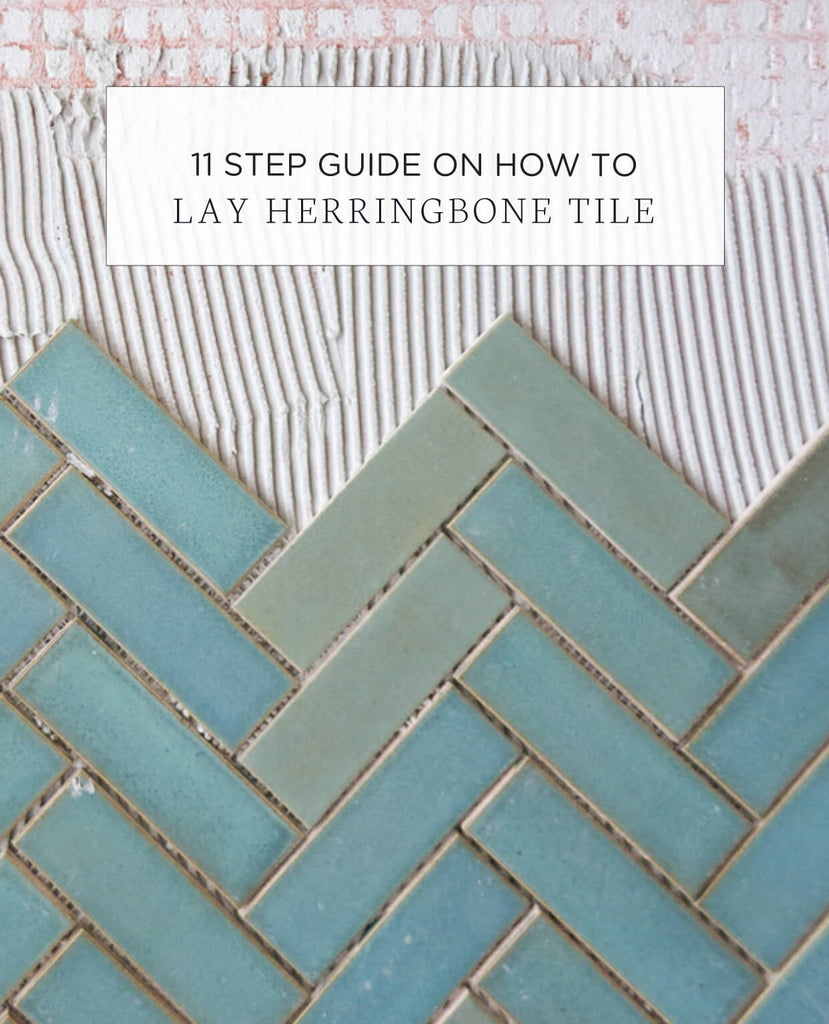
Struggling to lay herringbone tile? Tackling this pattern can be daunting. Fear not! In this quick guide, we'll simplify the process, offering expert tips and step-by-step instructions for flawless installation.
Mastering the art of laying herringbone tile can elevate any space, but it's a task that demands precision. In this comprehensive 11-step guide, we'll delve into essential techniques, from layout planning to grouting, empowering you to transform your floors and walls with confidence and precision.

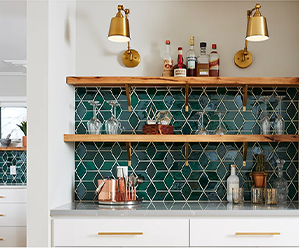
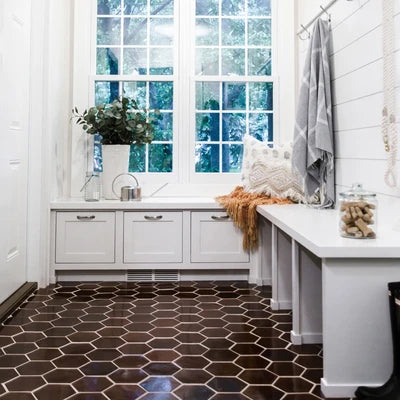
2"x6" Herringbone - 123R Patina
Photography and Interior Design by Bari J.
Bring any room to life with Mercury Mosaic’s unique decor and herringbone tile pattern ideas.
Herringbone Tile Pattern Tools and Supplies
Before diving into laying herringbone subway tile, it's crucial to gather the right tools. Whether you’re considering a herringbone pattern tile backsplash or herringbone floor pattern, the right tools will make the process even easier.
You may already have basic tools like a level and measuring tape at home, but you may need to purchase or rent others such as a tile cutter or wet saw specifically for this project. Each tool plays a vital role in achieving professional-looking results, so it's essential to have them all on hand before starting your tiling journey. Below is a list of tools you’ll need and some trusted brands we recommend.
- Herringbone Subway Tile
- Wet saw
- Notched trowel (1/8” notched trowels for walls, 3/8” for floors)
- Chalk line, laser level or standard level at least 24” long
- Wedge Tile Spacers
- Rubber mallet
- Grout float
- Tile adhesive varies depending on the space you’re tiling: kitchen walls, or floors, bathrooms, and other high-traffic or water-exposed areas
- Grout: depending on application, we recommend Laticrete Permacolor Select or Laticrete Spectralock Epoxy Grout
- Bucket for mixing grout
- Sponge
- Aqua Mix Sealer’s Choice Gold Grout Sealer (the gold standard!)
- Measuring tape
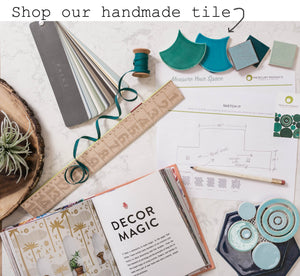
Order one of our herringbone sample packs to experience the look and feel of Mercury Mosaics' handmade artisan tiles.
How to Start Herringbone Tile Pattern
To center the herringbone tile pattern or double herringbone pattern, you can use a chalk line or laser level to mark the midpoint of the area and then adjust your layout accordingly.
If you're using individual tiles, you'll need to be extra meticulous with spacing and alignment to maintain the herringbone pattern's integrity. Luckily, we always mesh mount our herringbone tile pattern to ensure a quick and easy installation. When you’re working with our herringbone mesh-mounted tile sheets, which come pre-arranged in the desired pattern, you can simplify the process by aligning the sheets according to your herringbone tile layout plan.
Regardless of your approach, precise measurements and careful planning are essential to achieving a professional look while tiling in a herringbone pattern.
Which Direction to Lay Herringbone Tile
Traditionally, people install classic herringbone subway tiles or double herringbone pattern with the arrow or point of the pattern facing toward the entry or main focal area of the room. However, this isn't a strict rule!
Whether the arrow points towards or away from the entry point depends on your personal preference and the desired visual effect. Pointing towards the entry can create a welcoming feel while pointing away can elongate the space.
How to Lay Herringbone Tile Pattern in 11 Steps
When laying herringbone mesh-mounted tile sheets, begin by ensuring that your surface is clean, flat, and properly prepared with the appropriate adhesive or mortar. Lay out your sheets according to your predetermined pattern, making sure to stagger the joints for a seamless look.
One common challenge is maintaining consistency in spacing and alignment, especially around corners or edges. To mitigate this, use spacers and a level to ensure uniformity throughout the installation process. Additionally, be mindful of any irregularities in the surface, as these can affect the final result. Address any uneven areas with additional adhesive or mortar to prevent tiles from shifting or popping up over time.
By carefully planning and addressing potential issues as they arise, you can achieve a flawless herringbone tile installation with stunning visual impact.
Use the Mercury Mosaics tile calculator to make sure you have enough tile for your project before getting your hands dirty.
Double and Triple-Check Measurements
Carefully measure the area where you plan to install the tiles to ensure accuracy and avoid costly mistakes. We suggest using a high-quality measuring tape, such as the Stanley FatMax Tape Measure or the Komelon Self-Lock Tape Measure, to take precise measurements of the length and width of the space. Measure multiple times to catch any discrepancies and ensure that your layout will fit seamlessly within the designated area.
Once you have your measurements, transfer them to your herringbone tile layout plan, taking into account any obstacles or irregularities in the space. Pay close attention to corners, edges, and any architectural features that may impact the layout of the tiles. By double and triple-checking your measurements, you can catch any errors early on and avoid costly rework later in the installation process.
Find and Mark the Center Point

To determine the midpoint of your room or space, if you are using a herringbone pattern tile floor or herringbone tile backsplash, measure the length and width of the area and mark the halfway points on each side. Then, use a chalk line or laser level to create a crosshair at the intersection of these points, indicating the center of the space.
Finding and marking the center point is crucial for ensuring a symmetrical and balanced layout, especially with intricate patterns like herringbone. A laser level, such as the DEWALT DW088K Cross Line Laser, can help achieve precise markings, while a chalk line, like the Irwin Strait-Line Chalk Line Reel, is ideal for creating straight lines across the floor. Take your time with this step to ensure accuracy, as it will serve as the foundation for the rest of the installation process.
Sort and Organize Tiles

The third step in installing the herringbone tile pattern is to sort and organize the tile sheets before laying them out. Inspect each tile for imperfections, such as chips or cracks, and sort them according to their size and pattern variation. Lay out the tiles in the desired herringbone tile pattern to ensure a cohesive look and make any necessary adjustments. Using a tile leveling system, such as the Raimondi Tile Leveling System or the QEP Tile Leveling Clips, ensures uniform spacing and alignment between tiles.
Dry Layout the Tiles
Dry layout is crucial for identifying any potential issues or adjustments needed before applying adhesive, ensuring a flawless layout foundation for the rest of the project. Arrange the tiles on the floor without adhesive to visualize the final layout and ensure proper spacing and alignment. Start from the center point marked earlier and work outward, laying the tiles in the desired herringbone pattern tile.
To help with your herringbone tile layout, spacers such as the Raimondi Tile Leveling System or the QEP Tile Spacers help maintain consistent spacing between tiles.
Add Your Tile Trim and Ledger
Next, secure trim pieces along the edges of the tiled area to provide a clean, finished look and ensure tiles are properly aligned. For example, if you are installing a herringbone floor with a border, start by measuring and cutting the trim pieces to fit precisely. Then, use a high-quality adhesive like Laticrete or Mapei to affix them to the edges of the tile sheets.
Additionally, a tile ledger can maintain straight lines during installation. Use a level to ensure trim pieces are perfectly straight. Apply gentle pressure when setting the trim to avoid damaging the tiles.

Learn how artisan-crafted, handmade tiles like the ones from Mercury Mosaics can outshine and outlast machine alternatives.
Mark and Cut Necessary Tiles
Next in your herringbone tile installation, you’ll need to mark and cut the necessary tiles to achieve a flawless fit around edges, corners, and other obstacles. Measure the space where tiles will be installed, mark the tiles accordingly, and then cut them to the required size and shape. Typically, you'll use a pencil or marker to mark cutting lines on the tiles based on your measurements, ensuring accuracy and alignment with the overall pattern. Don't forget to measure two or three times before cutting!
For this task, a tile cutter or wet saw is essential. Quality wet saws from brands like MK Diamond offer precise cuts for ceramic tiles. Before cutting, be sure to read and follow manufacturer instructions for safe and effective use. When you're ready to cut, wear goggles and gloves to protect against debris.
Take your time to make accurate cuts, as any errors can disrupt the pattern and compromise the overall look of the installation.
Adhere the Tiles

Now it's time to make your space come to life! Using a notched trowel (1/8” notched trowels for walls, 3/8” for floors), spread thin-set mortar or tile adhesive evenly, ensuring complete coverage. Press each tile sheet firmly into place, maintaining alignment and pattern. Double-check alignment periodically and allow sufficient curing time before grouting for a professional finish.
Recommended brands for adhesive include Custom Building Products or Laticrete. Make sure to follow manufacturer instructions for mixing and application and work in small sections to prevent the adhesive from drying out too quickly.
Seal the Tiles
After adhering the tile sheets whether for your herringbone tile bathroom or herringbone wall tile, sealing them is essential for protecting against stains, moisture, and wear.
Apply a suitable tile sealer over the entire surface, ensuring thorough coverage. We recommend using Aqua Mix as well as a sealant applicator or brush to evenly distribute the sealer, following the manufacturer's instructions for drying time and application method. Sealing the tiles helps prolong their lifespan and maintain their appearance, making it an essential step while tiling in a herringbone tile design.
Grout Herringbone Tiles
Grouting your herringbone tile design is the final step to tiling your unique space. Grout is crucial for filling the gaps between tiles, providing stability, and enhancing the overall appearance.
Begin by mixing the grout according to the manufacturer's instructions until achieving a smooth consistency. We recommend Laticrete Permacolor Select or Laticrete Spectralock Epoxy grout, depending on the application.
Using a rubber float, spread the grout diagonally across the herringbone tiles, ensuring complete coverage and filling all joints. Wipe off excess grout with a damp sponge, working at a 45-degree angle to prevent disturbing the grout lines. Seal the grout after it cures to prevent stains and moisture penetration, ensuring a long-lasting and visually appealing herringbone tile installation.
Allow Time to Dry and Clean
Allowing time for the herringbone tiles to dry and cleaning the surface afterward are the final steps in the installation process. After grouting, allow the tiles to dry completely according to the manufacturer's recommendations, typically 24-48 hours. Once dry, use a damp sponge or cloth to wipe away any remaining grout haze or residue from the tile surface.
Follow our guide on cleaning ceramic tile to ensure proper care and reveal the full beauty of our handmade tiles.
From floor to ceiling, find inspiration from Mercury Mosaics gallery of handmade tiles to brighten any space.
Enjoy Your Beautiful Space

After completing the installation of the herringbone pattern tile, take a moment to bask in the beauty of your newly renovated space! Appreciate the meticulous work and attention to detail that went into creating the herringbone tile pattern. Relax and enjoy the enhanced ambiance and functionality of your refreshed area.
Tips For How to Lay Herringbone Tile
-
Order Samples First
Before committing to a large purchase for your herringbone tile floor or herringbone tile wall, order samples of the herringbone tile pattern you're considering. This allows you to assess their color, texture, and quality in your space, ensuring they meet your expectations before proceeding with the full installation.
-
Create a Mood Board with Goal in Mind
Visualize your desired outcome by creating an eye catching mood board that includes not only the type of tile samples you like but also complementary materials, color schemes, and design inspirations.
-
Keep Workspace Clean and Organized
Maintaining a clean and organized workspace is essential for an efficient and successful tile installation. Clearing clutter and debris minimizes the risk of accidents and makes it easier to move around and work effectively.
-
Plan For Extra Time
Planning for extra time to lay the tile pattern. Ensuring you have enough time and allowing for adjustments as needed ultimately lead to a more relaxed and satisfying outcome.
-
Use Resources and Ask For Help
Don't hesitate to leverage resources and seek assistance when needed during the tile installation. Whether it's consulting online tutorials, seeking advice from professionals, or enlisting help from friends or family, tapping into available resources can provide valuable guidance and support.
Additional Tips From Footprint Wood & Stone
We asked one of our trusted professional tile installers, Robb Olson of Footprint Wood & Stone for tips on how to lay herringbone tile with more ease and gorgeous results.
-
Ensure your foundation or starting point is spot-on
If your angle for the first few pieces is off then it only gets more difficult and off-center as you progress with grout lines becoming wider or pieces not fitting together. This is another great reason that Mercury Mosaics herringbone mesh mounted tile sheets are a great solution for easier installation and beautiful results.
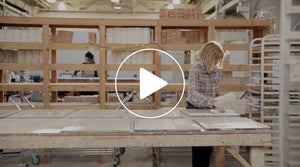
Process Makes Perfect: Mercury Mosaics Handmade Ceramic Tile For Any Space
The process of laying Mercury Mosaics herringbone subway tile can transform any space into a stunning masterpiece, especially with tile sheets minimizing errors along the way. From ordering samples to creating mood boards, keeping the workspace organized, planning for extra time, and seeking assistance when needed, each step plays a crucial role in achieving a flawless result.
Remember, practice makes perfect, and with dedication and attention to detail, your herringbone-style tile will be a success. If you have further questions or need assistance, don't hesitate to contact us.
You can also purchase a curated sample pack to see our tiles firsthand or explore our blog for additional inspiration and guidance. Let's make your tile dreams a reality together.


 for a chance to be featured in our gallery.


